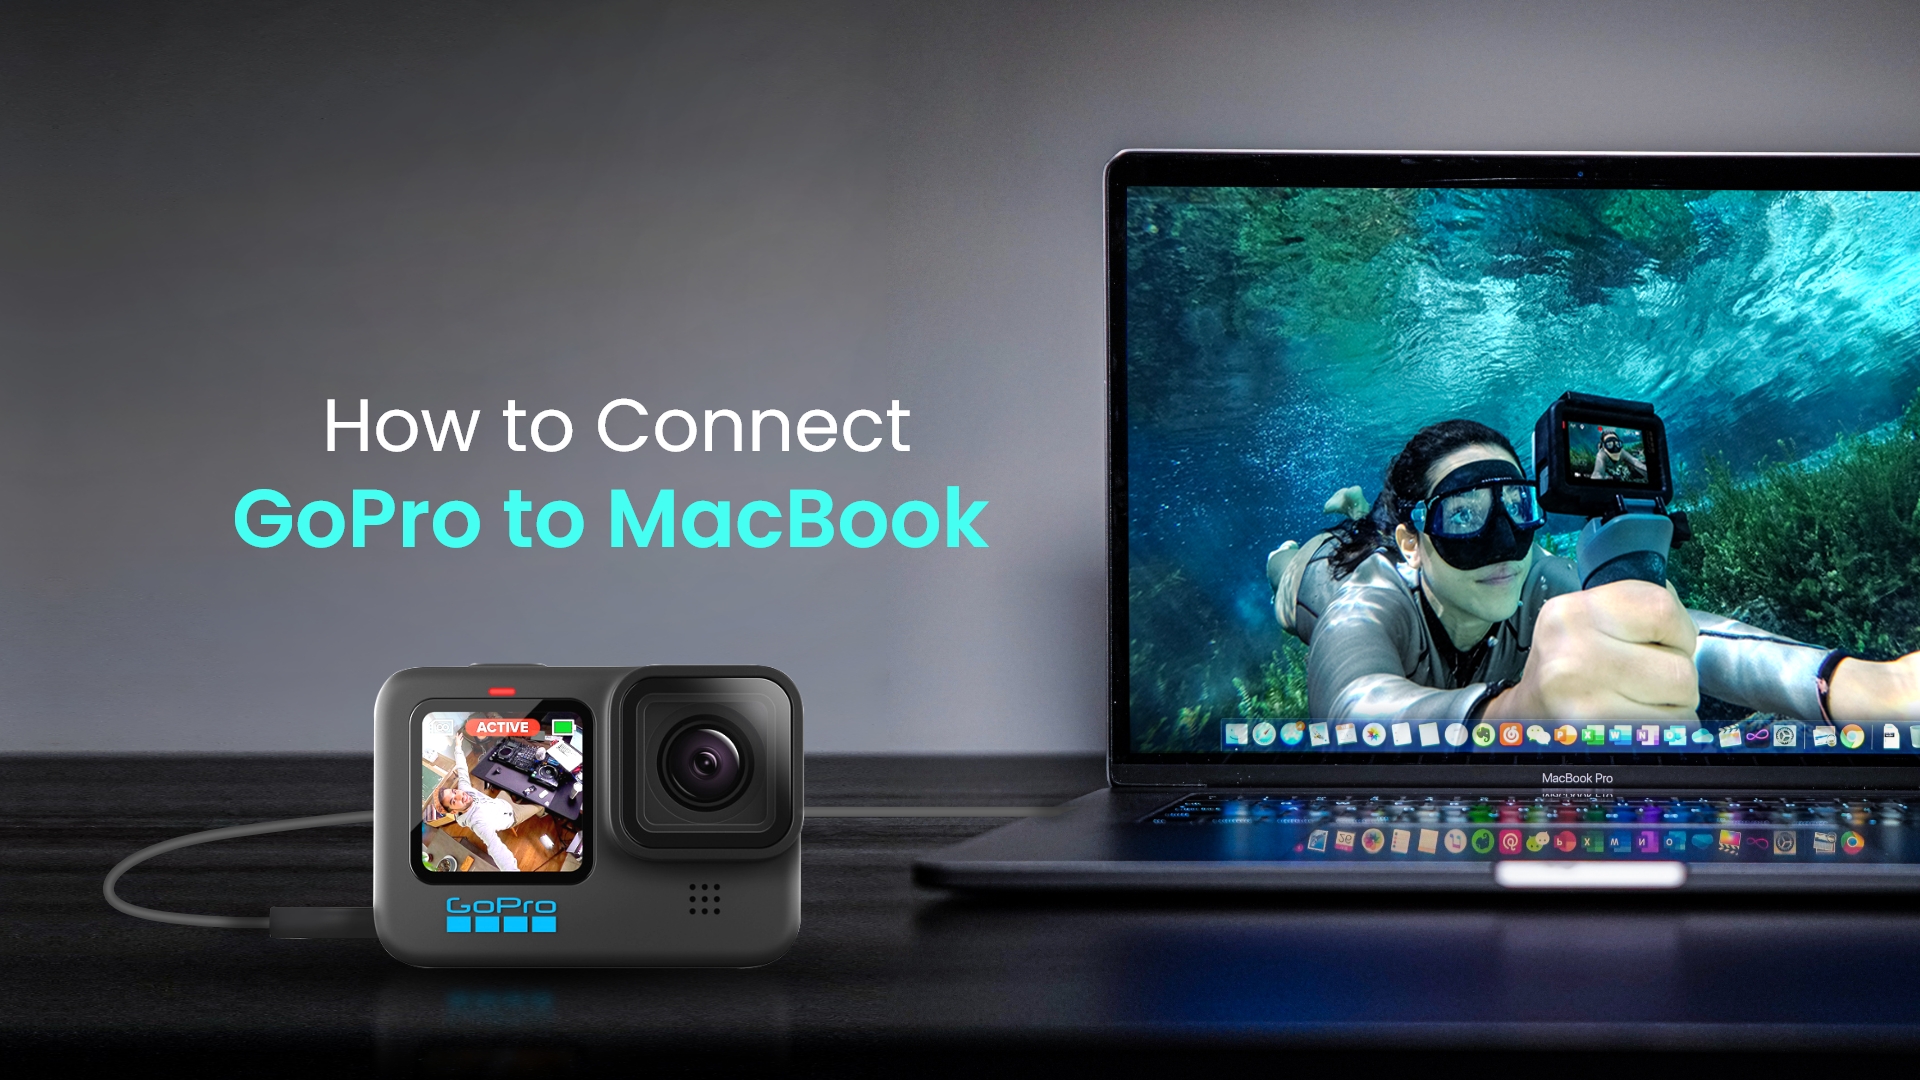
How to Connect GoPro to MacBook
The GoPro cameras are one of the most versatile cameras , up there with Canon and Nikon. However, most people using GoPro use a Windows OS to access its files. Many people assume that the Windows OS is much more accessible when it comes to connecting the GoPro. This tutorial will debunk this notion and teach you how to connect GoPro to MacBook.
Before we get into how to connect a GoPro to your MacBook, we’ll have to check if it’s possible first. However, by the end of this tutorial, you’ll find more than one way to connect a GoPro camera to a Mac.
Is it possible to connect your GoPro to your MacBook?
Yes, it is possible to connect your GoPro to your MacBook. Connecting your GoPro is just as easy on MacBook as on Windows. It also helps that one of the ways you can connect your GoPro is via a USB cable. GoPro even has an app dedicated to transferring files called Quik.
How to connect GoPro to MacBook | 5 easy ways
There are three ways you can connect your GoPro to a Mac computer. Firstly, we’ll see how to connect them with a USB cable. Next, we’ll look into accessing files inside your GoPro’s SD Card on your MacBook. Lastly, we’ll learn how to connect your GoPro via the Quik app.
How to connect GoPro to your MacBook via USB cable
Every GoPro comes with a charging cable with which you can charge the camera. Said cable is also how you’ll connect your GoPro to your MacBook. For this section, here’s a step-by-step process to connect GoPro to MacBook via a USB cable.
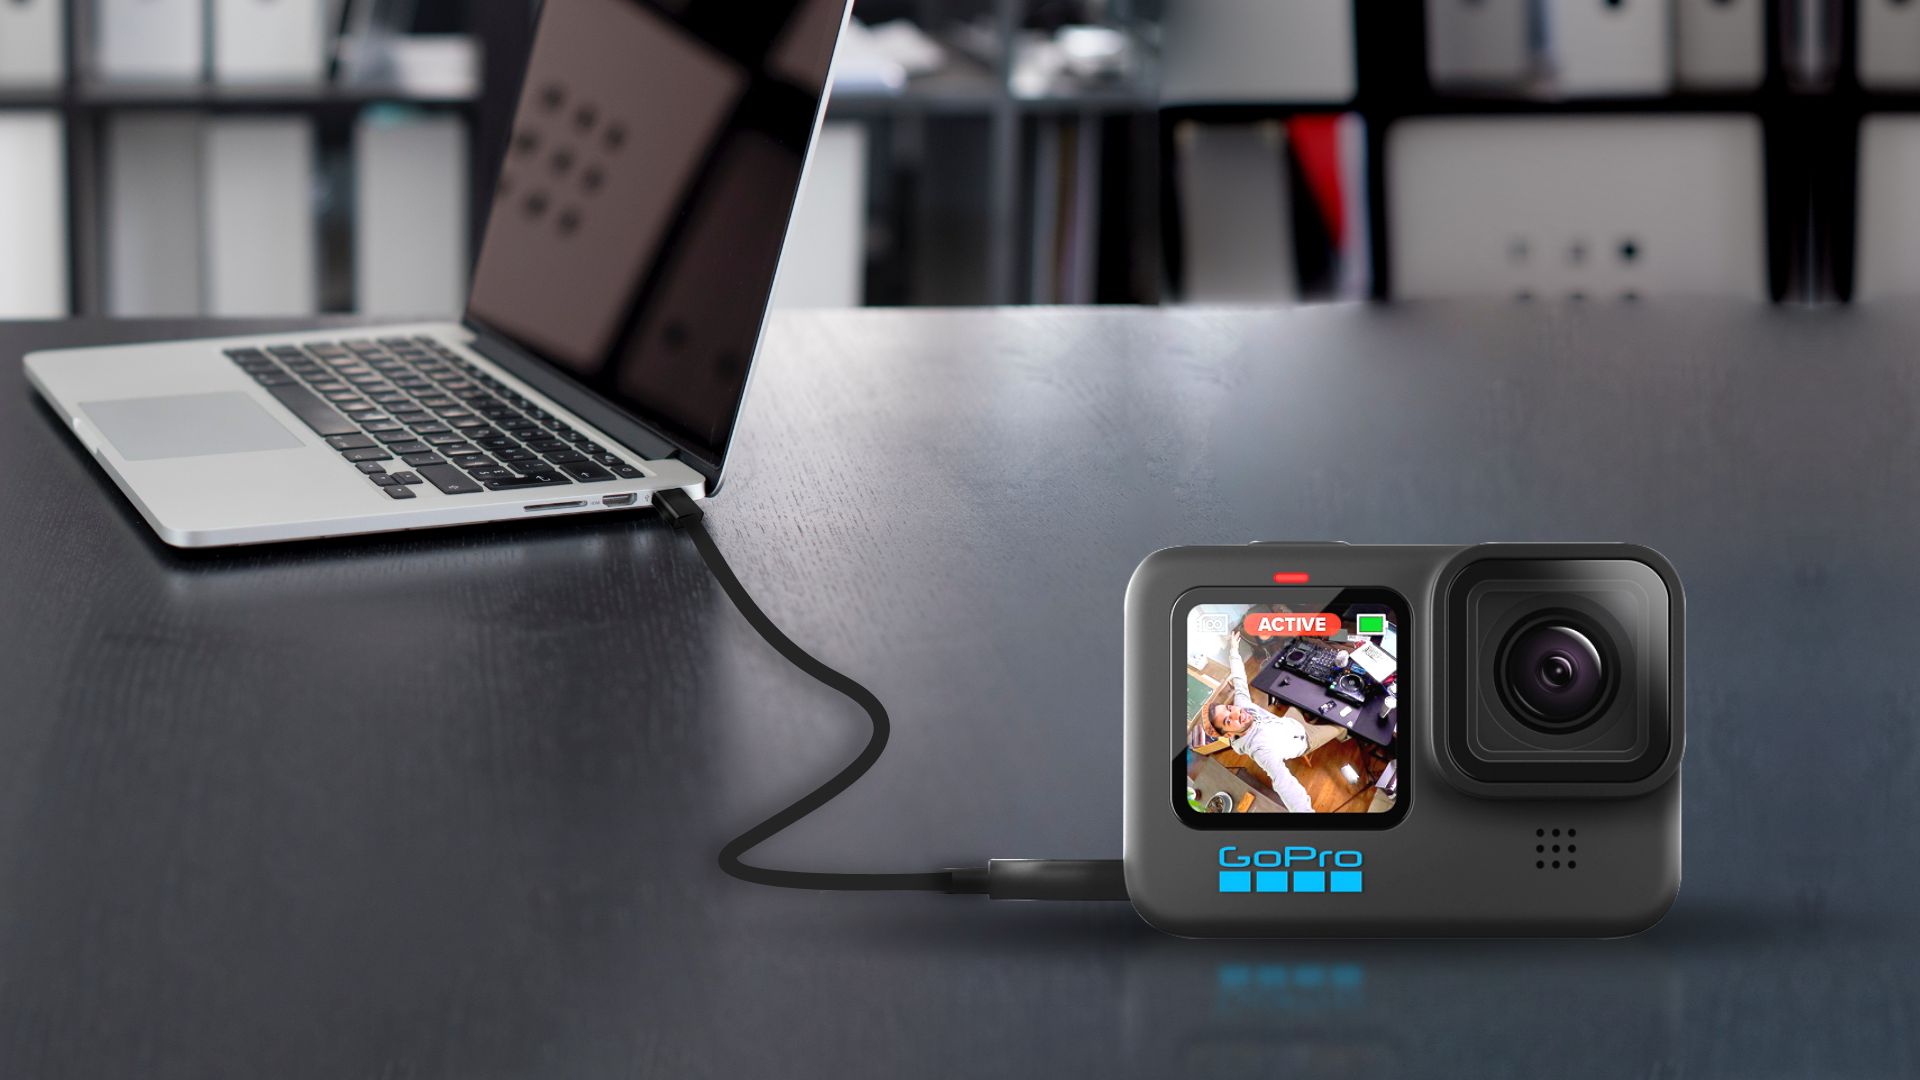
1) Turn on your GoPro camera
Before you connect your GoPro to the MacBook, turn on your GoPro camera. Turning it on will be necessary for the last part since it needs to be on to access the files inside.
2) Plug your GoPro into the MacBook via the USB cable
Open the cover of the GoPro, which should expose the camera’s USB cable. Then, connect the USB-C end of the cable to the camera’s port. Next, insert the USB-A port into the MacBook’s port.
3) Enter your GoPro camera’s folder
After connecting the GoPro to the MacBook via the USB cable, ensure the camera is on. If the camera is on, then it should open on your MacBook. If not, open Finder and search for the Camera’s folder in the Navigation pane.
Once inside, Go to DCIM; you should find a folder that ends with “GoPro.” Now you can transfer your photos from the GoPro camera to your MacBook.
How to connect GoPro to your MacBook via an SD card
If you can’t use a USB cable, there’s another way to connect and extract your photos from the GoPro camera. This section will teach us how to connect GoPro to MacBook via the SD card. However, you need an SD card reader using this method.
1) Take your SD card out of your GoPro camera
Firstly, we’ll have to take the SD card out of your GoPro camera. Here’s how you eject the SD card out of the GoPro camera
- Turn off the GoPro camera
- Open the bottom door of the GoPro and look for the SD card
- Push the SD card to eject it from the slot.
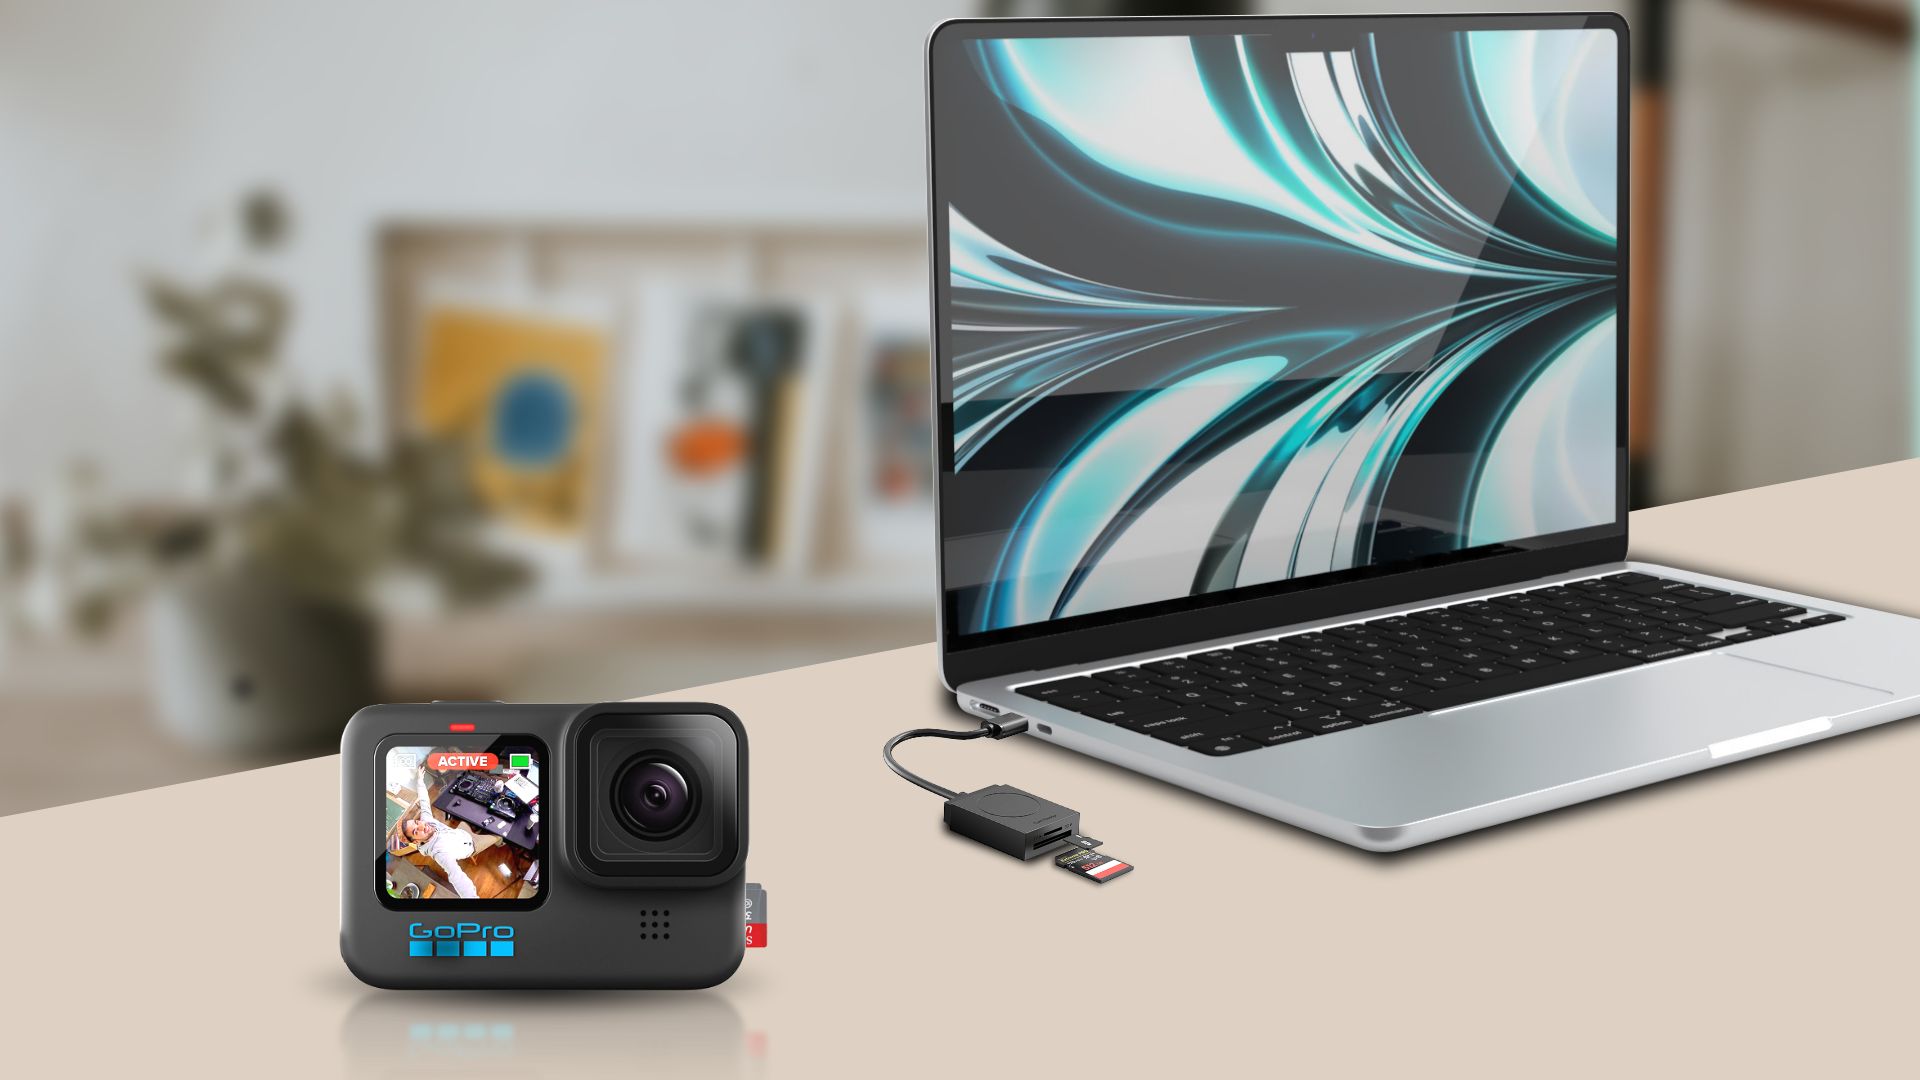
2) Now place the SD card into the SD card reader
For this next step, you need to have an SD card reader, where you will insert the SD card. Then, connect the SD card reader with the USB cable to the MacBook.
But why an SD card reader specifically? Most laptops have an SD card reader built into them but are made for standard-sized SD cards. Almost all of the SD cards the GoPro supports are micro SD cards, which are smaller. Most SD adapters have a slot for inserting micro SD cards
Image 04: Alt-text: How to connect GoPro to your MacBook via SD card 02
3) Open the Finder and enter the SD card
Finally, it is time to enter the SD card and extract the folders. Here’s the step-by-step process for entering the SD card on your MacBook.
- Open Finder and enter the SD card, commonly named Untitled. If you want, you can rename it to something else.
- Inside the SD card, enter the folder DCIM
- Finally, there should be one solitary folder, the name of which ends the GOPRO. Enter it, and you can now transfer photos from the SD cards.
How to connect GoPro to your MacBook via the Quik app
Finally, there is another way you can connect your GoPro camera, and that is via the Quik app. For this process, we will look into how to connect GoPro to MacBook computers via the Quik app.
Image 05: Alt-text: How to connect GoPro to your MacBook via the Quik app 01
1) Download and install the Quik app from the Mac App Store
Firstly, Download the Quik app from the Mac App Store.
Alternatively, you can download the Quik installer from GoPro’s website. After downloading the Quik installer, open it to install Quik for your Mac.
After you’ve finished installing the Quik app, create a new account. Alternatively, you can sign in to an existing account.
2) Connect your GoPro and Launch the Quik app
Connect the GoPro to the MacBook via the USB cable. Check out this tutorial’s section on How to connect GoPro to your MacBook via the USB cable.
After connecting the GoPro to the MacBook, the Quik app should launch. If not, start the program manually from the Launchpad.
3) Import your files from GoPro
After signing in to your account, click on Import Files from the Quik main window. Now, the app will import all the photos and videos you captured on your GoPro camera to the Mac.
How to connect GoPro to Mac using the image capture app
On your Mac, you can access the GoPro camera using the Image Capture app and connect the camera to the Mac with a USB-C cable. So, to download the GoPro video to Mac using the Image Capture app, you can follow these steps.
Learn how to transfer GoPro videos to MacBook with the image capture app
- Connect the GoPro to the MacBook with the USB-C cable by inserting it into the corresponding ports on both devices.
- Switch on your GoPro camera.
- Launch the Image Capture app located in the Applications folder.
- In the left navigation window, click on your GoPro’s name.
- Choose the folder where you want to save the imported files from the Import To menu and click Import All.
- When the import is done, shut off the Image Capture and disconnect the camera from the MacBook.
How to connect GoPro to Mac Wirelessly
One of the best features of a GoPro camera is that it can create a WiFi network. This allows you to connect it wirelessly with your iPhone, Android, iPad, PC, and Mac. This section will explore two methods of attaching the GoPro to the Mac wirelessly: the web server and the Camera Suite app. But before that, you have to set up the WiFi network on the GoPro.
Steps to set up WIFI network on GoPro
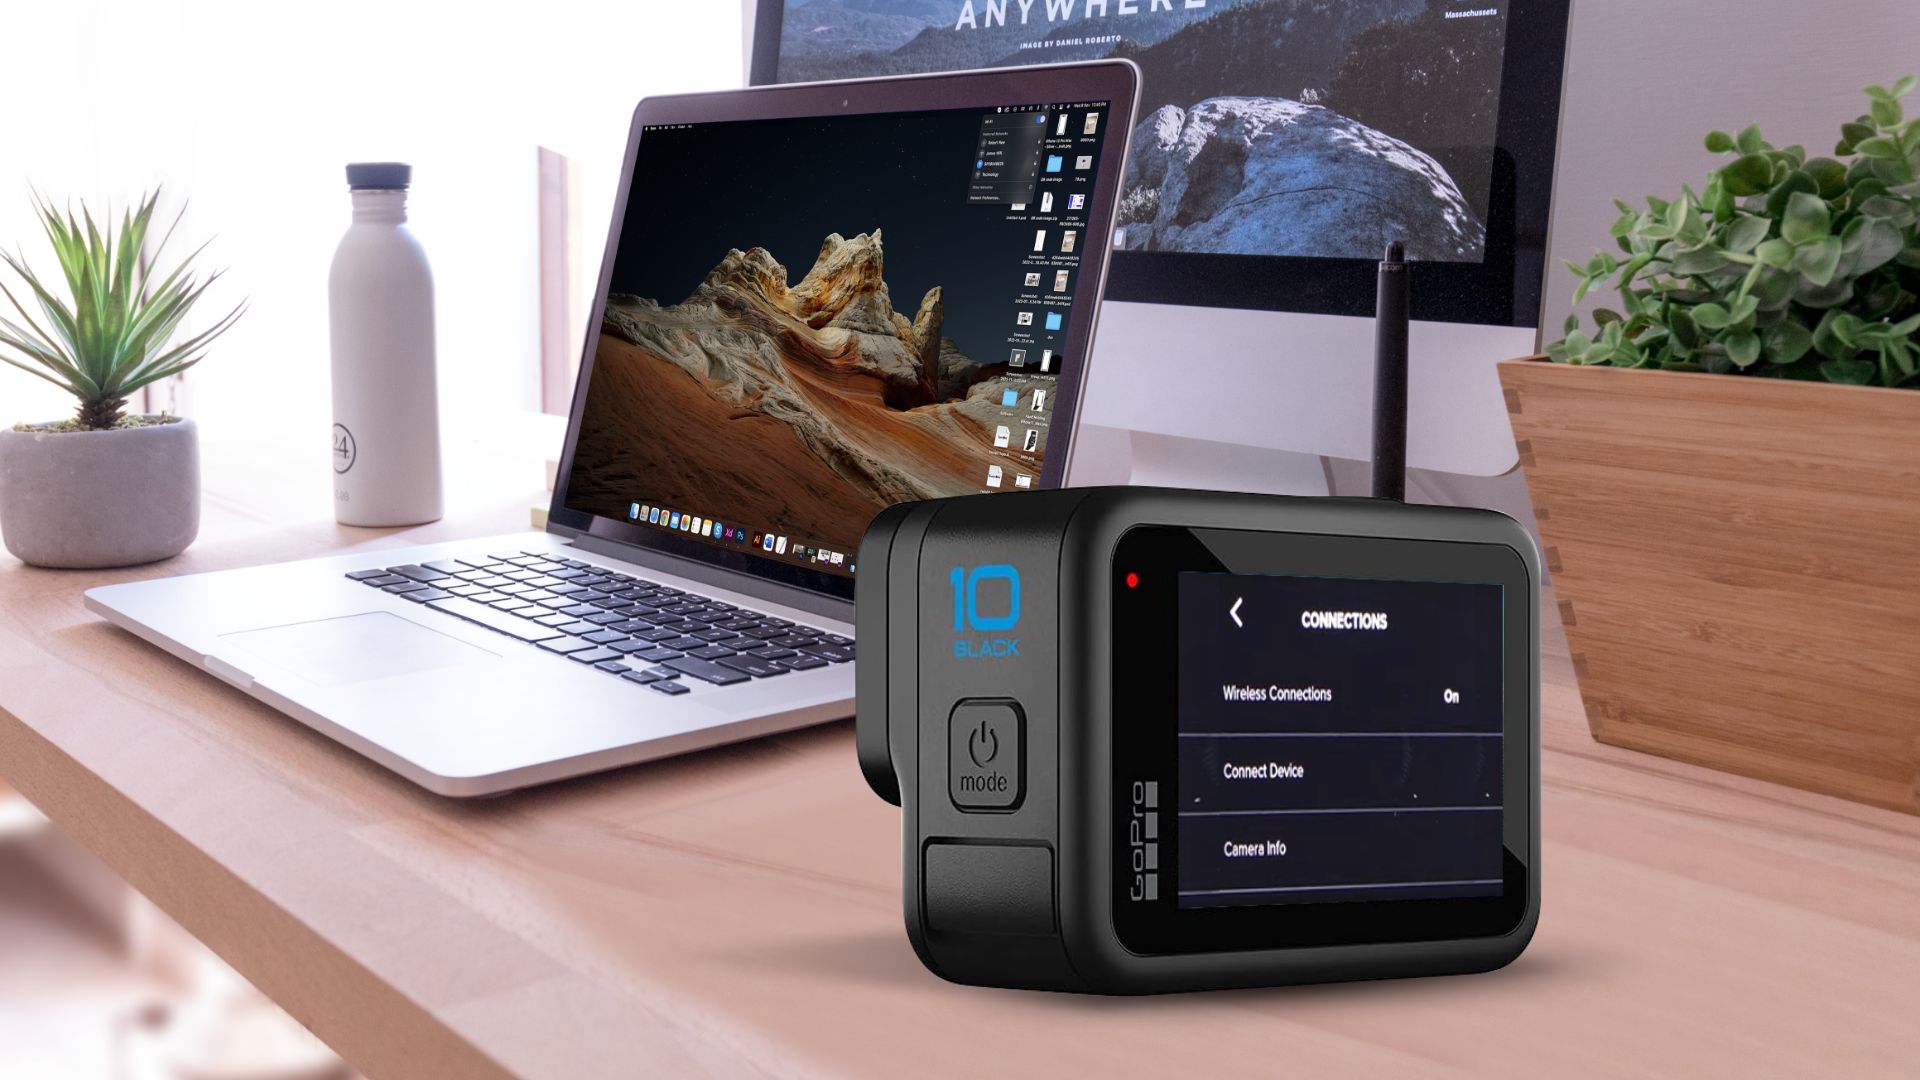
- On your GoPro screen, swipe down and tap on “Preferences.”
- Tap on “Connections” and make sure both Bluetooth and WiFi are turned on.
- Launch the official GoPro app on your iPhone
- Use the app to pair your phone with your GoPro.
- In the app, go to the camera info section and find the WiFi password of the camera.
- On your Mac or PC, scan for available WiFi networks and connect to the one that belongs to your GoPro.
- Use the password that you got from the app and click connect.
Connect GoPro to Mac using the web server

This will let you access all the files on your GoPro camera without needing to install any software on your Mac or pc. Before you begin the steps, also ensure that your GoPro is in normal preview mode because this method doesn’t work in playback or any menu.
- Launch a web browser (e.g., Safari) and enter the address: 10.5.5.9/videos/DCIM.
- Browse the files or folders that you want to download.
- Right-click on the file and choose “Download Linked File.”
- Select a folder to save images and videos on your computer and click Download
Connect GoPro to Mac with the Camera Suit app
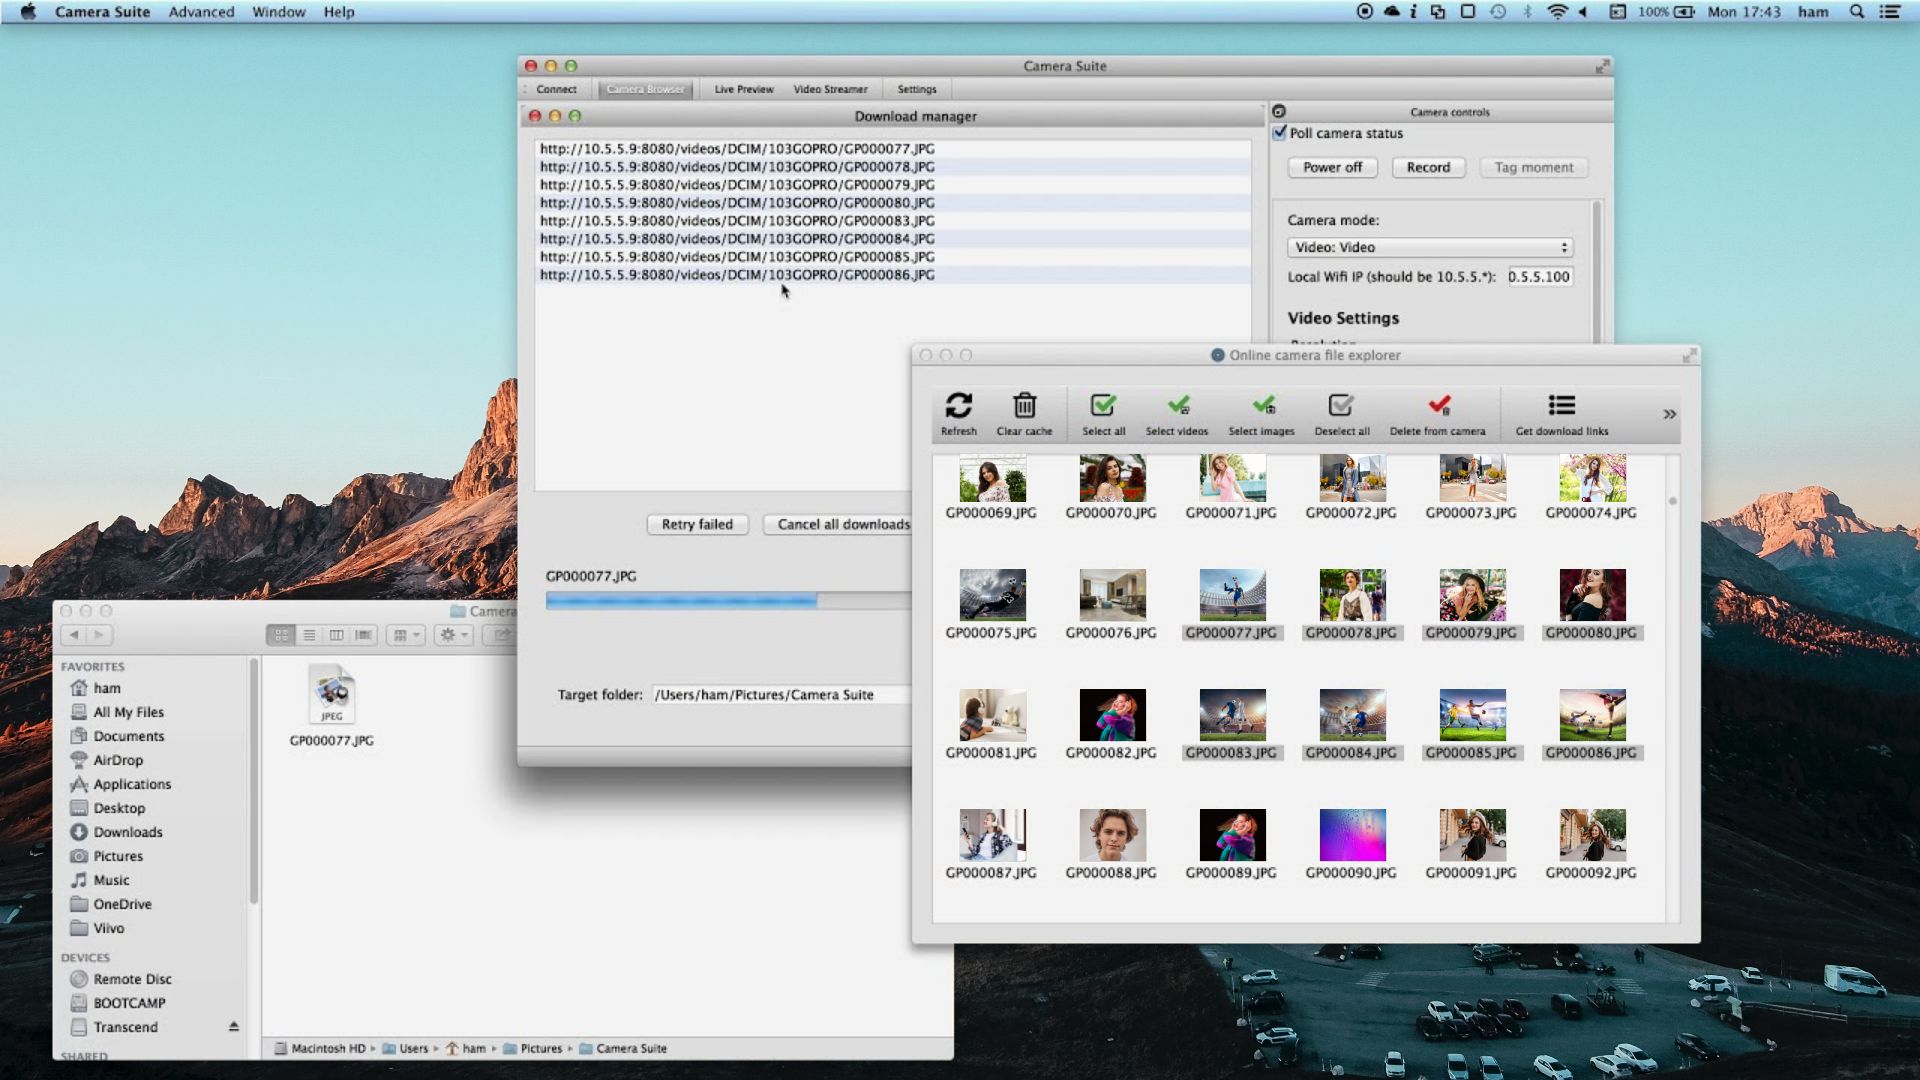
The Camera Suit app allows you to browse and download media, view live previews, control your GoPro, and access other features. With this app, you can stream live audio and video from your GoPro to other players like VLC or any other player. Follow the steps –
- First, download the Camera Suit app on your Mac from the Mac App Store.
- Next, go to Preferences > Wireless Connections > Connect Device and select “App Mode.”
- Then, join the same Wi-Fi network on your Mac that is created by the GoPro camera.
- After that, launch the Camera Suit app on your Mac and choose the GoPro model that you have.
- Finally, click the “Connect to camera” button to link the camera.
Conclusion
In this tutorial, we’ve learned that connecting GoPro cameras to MacBook is just as easy as doing it on Windows. Moreover, we’ve also looked into how to connect GoPro to MacBook computers and the three ways we can do that.
If you’ve found this tutorial helpful, consider checking out our tutorial on connecting a Canon camera to Mac. You can also check out our tutorial and learn a thing or two about connecting a wireless headphone to MacBook.